Here's an easy tutorial on how to make your own blog swap button using PicMonkey and Picasa Web Album.
You have to have a Google+ account or Blogger account in order to use Picasa. If you don't have you can use other sites like Photobucket to upload your blog button.
1. Download a background photo you wanted to use. In this tutorial I'll be using an white background which you can also download. Highlight below > Right click on your mouse > Save Image as.
4. Save your masterpiece
When the photo has been uploaded, click it.
You have to have a Google+ account or Blogger account in order to use Picasa. If you don't have you can use other sites like Photobucket to upload your blog button.
1. Download a background photo you wanted to use. In this tutorial I'll be using an white background which you can also download. Highlight below > Right click on your mouse > Save Image as.
2. Open Picmonkey and upload the background image.
Click EDIT A PHOTO.
Then, OPEN your image.
2. Resize your background image.
The usual size of blog swap buttons are 200x80 pixels. But you can alter the size if you want.
While choosing your desired size uncheck KEEP PROPORTIONS. When you have chosen the size you want click APPLY.
3. Now, add texts and designs to your blog swap button using the edit tabs of PicMonkey.
4. Save your masterpiece
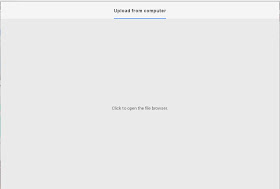
5. Open your Picasa Web Album and upload your photo.
After uploading click ADD and wait for your photo.
When the photo has been uploaded, click it.
Then, right click on the image and press COPY IMAGE URL.
Now, on your blog click Layout >Add widget > HTML code > Copy the code below.
<a href="http://misselayneousthings.blogspot.com/p/grab-our-button.html"><img border="0" alt="Photobucket" src="https://blogger.googleusercontent.com/img/b/R29vZ2xl/AVvXsEjGy-fVHcCXU5l0wc8O4VKaRpuUxNmBtDEvDwvCQk9Gqg0e70uJVR8f0rCJaBDXYP5o2eLUCri7V9YBhuhD6ulz_SK1guEO9aKO3TOyU18OMrXU93qVp1FDYIFG8BcYghAfTI730b3cs9pS/w220-h85-no/AD.jpg" /></a>
Change the red ones to your BLOG URL or to the page where you wanna link the blog swap button.
Change the blue ones to the URL of your blog swap button (the url you copied from picasa).
And you're done!!!
Happy Blogging!
How to Add a Blog Button Code Box? Check this tutorial.


No comments:
Post a Comment